Building your own PC offers exciting benefits. You get to customize your setup to fit your needs, save money, and learn valuable skills along the way. Many people worry that the process of how to build your own PC is too complicated. However, modern components are designed to be user-friendly. You don’t need advanced technical knowledge to succeed in building your own PC. In fact, you can often save money by choosing your parts wisely. For systems under $800, building your own PC is usually cheaper than buying a pre-built one. So, why not give it a try? With the right guidance, you can easily build your own PC that meets your needs!
Key Takeaways
Building your own PC allows for customization, cost savings, and skill development. It’s a rewarding experience that can fit your specific needs.
Understand essential components like CPU, motherboard, RAM, storage, PSU, and GPU. Each part plays a crucial role in your PC’s performance.
Follow a step-by-step assembly guide to install each component correctly. Take your time and double-check connections to avoid mistakes.
Troubleshoot common issues like no power or overheating by checking connections, ensuring airflow, and maintaining cleanliness.
Join communities and use resources for support. You’re not alone in this journey, and many are ready to help you succeed.
Essential Components to Build Your Own PC
Building your own PC requires several key components. Each part plays a crucial role in ensuring your system runs smoothly. Let’s break down what you need to know about each component.
CPU
The CPU, or Central Processing Unit, is often called the brain of your PC. It executes instructions and manages tasks for other components. When you pick a CPU, consider the following:
Max Turbo Frequency: A higher frequency boosts performance in demanding games, enhancing your frames per second (FPS).
Cores and Threads: More cores and threads improve multitasking. This is essential if you plan to stream while gaming or run multiple applications simultaneously.
Specification | Impact on Performance |
|---|---|
Number of Cores | More cores allow for better multitasking and improved performance in applications designed to utilize them. |
Clock Speed | Higher clock speeds enable faster processing of instructions, directly affecting task completion times. |
Cache Size | Larger cache can improve performance in multitasking environments, but may not always be beneficial depending on usage. |
Motherboard
The motherboard is the backbone of your PC. It connects all components and determines compatibility. When you pick a motherboard, keep these factors in mind:
Form Factor: Choose a size that fits your case. Common types include ATX, Micro ATX, and Mini ITX.
Socket Type: Ensure it matches your CPU. For example, AMD Ryzen CPUs use the AM4 socket, while Intel uses LGA 1200 for tenth-generation CPUs.
Chipset: This controls how components interact. Make sure it supports your CPU and has the features you need.
Form Factor | Description |
|---|---|
ATX | The most common form factor, providing a good balance of space and features. |
Micro ATX | A smaller form factor for compact builds, fitting into smaller cases. |
Mini-ITX | Designed for very compact builds, typically with fewer expansion slots. |
RAM
Random Access Memory (RAM) is crucial for your PC’s performance. It temporarily stores data for quick access. Here’s what to consider when you pick RAM:
Type: DDR4 is the current standard, offering faster data transfer rates and larger capacities.
Capacity: More RAM allows you to run more applications simultaneously. For gaming, 16GB is a good start, while 32GB is recommended for content creation.
Type of RAM | Characteristics | Performance Impact |
|---|---|---|
DDR4 SDRAM | Current standard, faster data transfer rates, larger capacities, lower voltages | Improved system responsiveness, better frame rates in gaming |
DIMM | Larger modules for desktop motherboards | Designed for standard desktop systems |
SO-DIMM | Smaller modules for laptops and mini PCs | Used in compact systems |
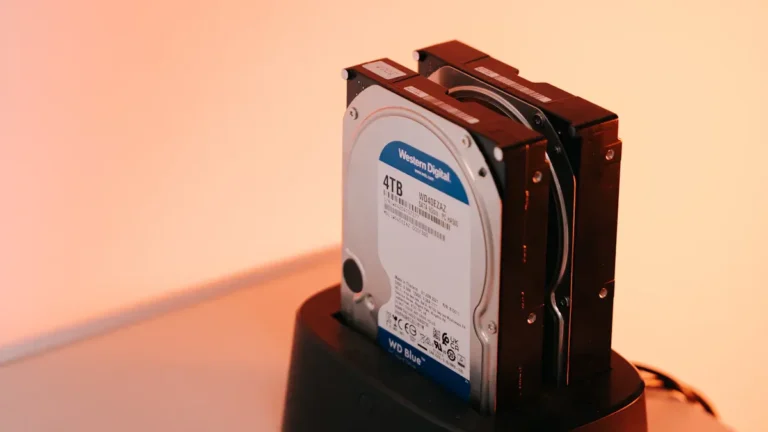
Storage
When it comes to storage, you have two main options: SSDs and HDDs. SSDs are faster and more reliable, while HDDs offer more storage for less money. Here’s a quick comparison:
Speed: SSDs load data significantly faster than HDDs, improving system responsiveness.
Reliability: SSDs have no moving parts, making them less prone to failure.
Cost: HDDs are generally cheaper per gigabyte, but SSDs provide better performance for gaming and demanding applications.
PSU
The Power Supply Unit (PSU) is vital for your PC’s stability and safety. When you pick a power supply, consider:
Wattage: Ensure it provides enough power for all components.
Certification: Look for a PSU with a good efficiency rating (like 80 Plus) to save on electricity costs.
Protection Features: A quality PSU protects against power surges and fluctuations, preventing damage to your components.
GPU
The Graphics Processing Unit (GPU) is essential for gaming and rendering. When you pick a graphics card, think about:
Performance: A better GPU enhances immersion and visual quality in games.
VRAM: More video memory allows for better performance in high-resolution settings.
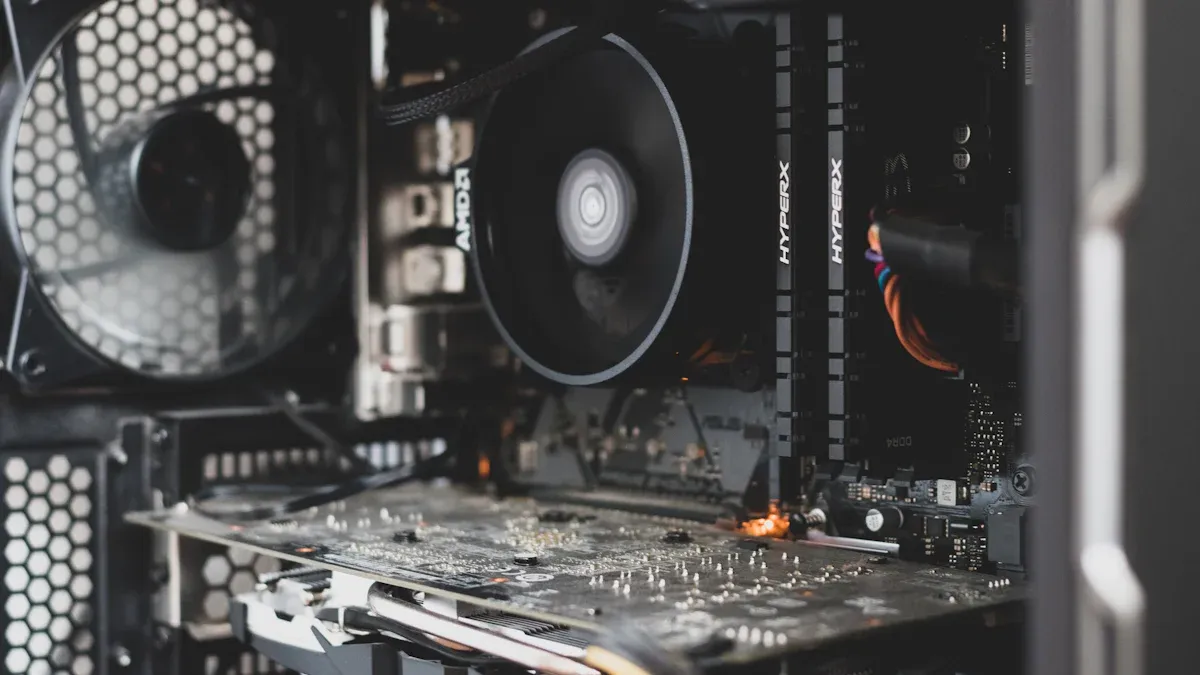
Case and Cooling
The case houses all your components and affects airflow. When selecting a case, consider:
Size: Ensure it fits your motherboard and has enough space for your GPU.
Airflow: Look for cases with good ventilation to keep temperatures down.
Cooling Options: You can choose air cooling or liquid cooling. Make sure to pick a CPU cooler that fits your case and provides adequate cooling.
To maintain optimal temperatures, monitor your system’s temperatures regularly. Use software tools to check CPU and GPU temperatures under load.
Tip: Clean your case regularly to prevent dust buildup, which can block airflow and cause overheating.
By understanding these essential components, you can confidently build your own PC that meets your needs and preferences.
Step-by-Step Assembly Guide
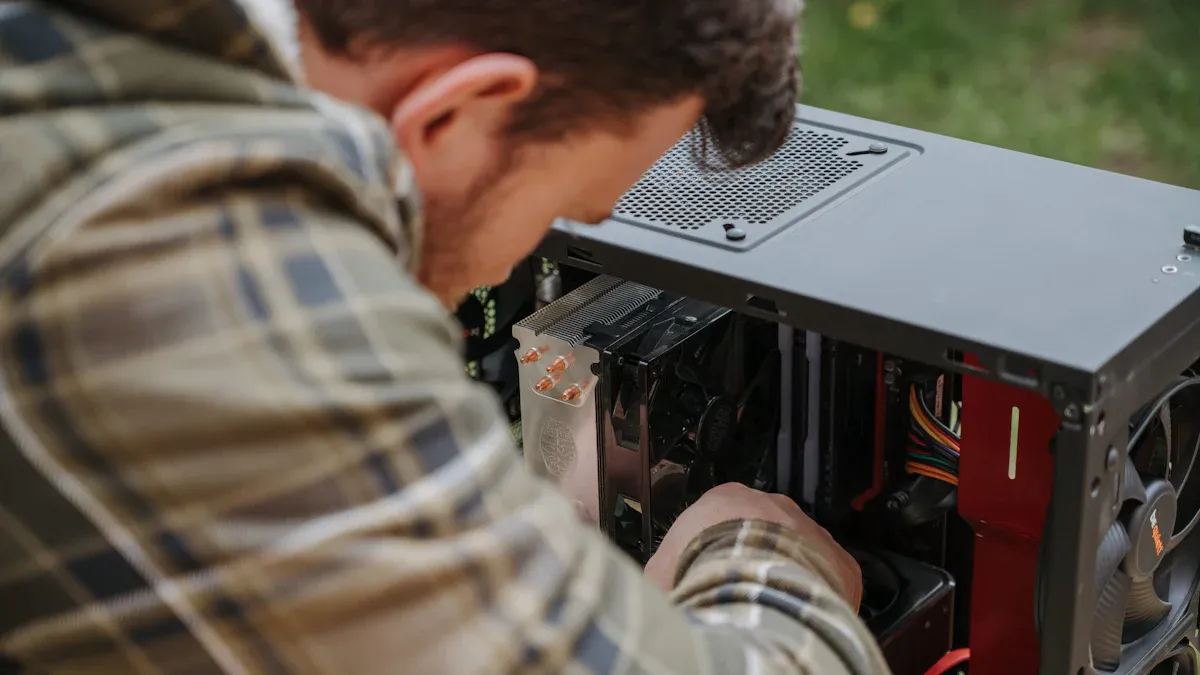
Building your own PC can be a rewarding experience. Let’s walk through the assembly process step by step, ensuring you understand how to install each component correctly.
Install CPU
Start by carefully installing the CPU. Here’s how to do it:
Prepare the Socket: Open the CPU socket lever on the motherboard.
Align the CPU: Match the notches on the CPU with the socket. Gently place it in without forcing it.
Secure the CPU: Lower the lever to lock the CPU in place.
Tip: Avoid common mistakes during CPU installation. For instance, plan your assembly process to prevent missing parts. Always read the assembly guide and use the right tools to avoid damaging components.
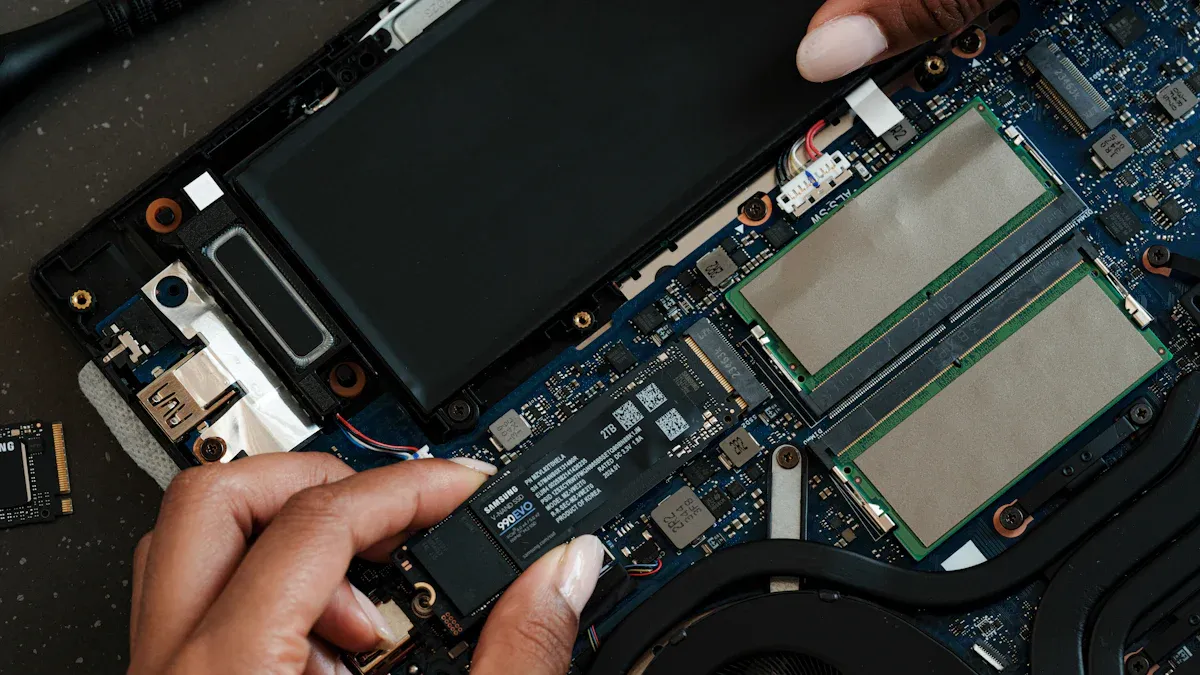
Add M.2 SSD
Next, let’s install the M.2 SSD. Follow these steps:
Locate the M.2 Slot: Find the M.2 slot on your motherboard.
Insert the SSD: Align the notch on the SSD with the slot and insert it at a slight angle.
Secure the SSD: Use a screw to fasten it down.
Install Cooling System
Now, it’s time to install the cooling system. Proper cooling is crucial to prevent overheating. Here’s what to consider:
Choose the Right Cooler: Depending on your CPU, select either air or liquid cooling.
Apply Thermal Paste: If your cooler doesn’t come with pre-applied paste, apply a small amount to the CPU.
Mount the Cooler: Follow the manufacturer’s instructions to secure the cooler properly.
Key Considerations: The geographical location of your setup can affect cooling needs. For example, if you live in a hot climate, you might need a more robust cooling solution.
Insert RAM
Next, let’s install the RAM. Here’s how to do it correctly:
Check Compatibility: Ensure the RAM matches your motherboard specifications.
Align and Insert: Hold the RAM by its edges, align the notch with the slot, and insert it at a 45-degree angle. Apply firm pressure until it clicks.
Repeat for Additional Modules: If you have more than one RAM stick, repeat the process for each.
Best Practices: Always power off and unplug your PC before handling components. Handle RAM by the edges to avoid static damage.
Test Components Outside Case
Before final assembly, it’s wise to test your components outside the case:
Set Up a Test Bench: Place the motherboard on a non-conductive surface.
Connect Power: Attach the PSU and connect the necessary cables.
Power On: Turn on the system to check if all components work correctly.
Mount PSU
Now, let’s mount the PSU in the case:
Identify the Location: Find the PSU mounting area, usually at the bottom or top of the case.
Insert the PSU: Place the PSU in the designated slot, ensuring the fan faces outward for optimal airflow.
Secure the PSU: Use screws to fasten it in place, avoiding the use of a drill.
Install Motherboard
Next, it’s time to install the motherboard:
Prepare the Case: If necessary, install motherboard standoffs in the case.
Align the Motherboard: Carefully place the motherboard inside the case, aligning it with the standoffs.
Secure the Motherboard: Screw it down in an ‘X’ pattern to ensure even pressure.
Important Note: Be cautious not to overtighten the screws, as this can damage the motherboard.
Add GPU
Now, let’s install the graphics card:
Locate the PCIe Slot: Find the PCIe slot on the motherboard.
Insert the GPU: Align the GPU with the slot and press down firmly until it clicks into place.
Secure the GPU: Use screws to fasten it to the case.
Common Challenges: If you encounter issues, try reseating the graphics card or testing it in a different slot.
Putting It All Together
Finally, it’s time for the last steps:
Connect All Cables: Ensure all power and data cables are connected properly.
Sort Front Panel Connections: Organize these connections before securing the PSU to minimize clutter.
Close the Case: Once everything is connected, close up the case and prepare for your first boot.
By following these steps, you’ll successfully build your own PC. Remember, take your time and double-check each connection. Enjoy your new custom-built machine!
Troubleshooting Common Issues
Building your own PC can be a fun adventure, but sometimes things don’t go as planned. Here are some common issues you might face and how to fix them.
No Power
If your PC shows no signs of power, don’t panic! Here’s what you can check:
Power Source: Make sure the outlet works by plugging in another device.
Power Switch: Check that the power switch on the PSU is ON and the power cable is securely connected.
Monitor Connection: Ensure the monitor’s power cable is plugged into a working outlet and that the monitor is turned on.
Internal Connections: Inspect all internal power connections to the motherboard and components.
Front Panel Connectors: Verify that the front panel connectors are correctly seated on the motherboard.
If you still have no power, you might have a faulty PSU or motherboard.
Boot Errors
Boot errors can be frustrating. Here are some common signs and steps to troubleshoot:
No Power: The PC shows no signs of power.
No Display: The monitor doesn’t receive a signal.
No Boot: The system fails to complete POST or load the OS.
To resolve these issues, follow these steps:
Confirm the power source is working.
Check all power connections.
Inspect the monitor and its cables.
If the problem persists, consider testing with a different PSU.
Overheating
Overheating can lead to performance issues or even damage your components. Here’s how to keep your PC cool:
Check Fans: Ensure all fans are working properly.
Airflow: Avoid blocking air vents. Place your PC on a flat surface.
Clean Regularly: Dust can accumulate and block airflow, so clean your PC often.
Thermal Paste: Change the thermal paste on your CPU regularly to maintain cooling efficiency.
Peripheral Issues
Sometimes, peripherals can act up. Here’s a quick guide to common problems:
Peripheral Issue | Solution |
|---|---|
Clicking Noise without Typing | Disable Filter Keys and Toggle Keys in Control Panel. |
Mouse or Keyboard Not Working | Unplug and replug the device, check drivers, and reinstall if necessary through Device Manager. |
No Display on Monitor | Test the monitor on another PC, replace the power cable, and refer to troubleshooting guides. |
By following these tips, you can troubleshoot common issues and enjoy your new PC without a hitch!
Building your own PC can be a rewarding journey. You’ve learned about essential components, assembly steps, and troubleshooting tips. Now, it’s time to take the plunge! Start your own build your own pc project and enjoy the satisfaction of creating a system tailored just for you. Remember, you’re not alone in this. Many resources and communities are ready to support you along the way. So, gather your parts, follow the steps, and dive into the exciting world of PC building!
FAQ
What tools do I need to build a PC?
You’ll need a screwdriver, anti-static wrist strap, and possibly pliers. A clean workspace helps too. Having these tools ready makes your PC assembly smoother.
How long does it take to build a PC?
Building a PC usually takes about 2 to 4 hours. This depends on your experience and the complexity of your setup. Take your time to ensure everything is done correctly.
Can I upgrade my PC later?
Absolutely! You can upgrade components like RAM, storage, or the GPU later. This flexibility allows you to enhance your PC’s performance as your needs change.
Do I need to install an operating system?
Yes, you must install an operating system (OS) to use your PC. Popular options include Windows, Linux, or macOS (for Apple hardware). Choose one that fits your needs.
Is building a PC cheaper than buying one?
Often, yes! Building a PC can save you money compared to buying a pre-built one. You can choose parts that fit your budget and needs, making it cost-effective.